Lessons Learned in Live Looping Cello
I started learning cello around 5 years ago, and one of my dreams was to do live looped cello. My inspiration comes from Zoë Keating, Cremaine Booker "That Cello Guy", Rachel Lander, and Kevin Olusula, like this video, and loads more on youtube.
I've recently completed my first live looping project/experiment: Daughter of the Sea
Live looping
Live looping is one single live performance that sounds like several performers are playing. What you play early in the piece is recorded, then later played back repeatedly, or looped. In this piece (Daughter of the Sea) I play a single pizzicato, plucked note. That note is recorded and immediately starts playing back, and continues through most of the rest of the piece. Then I play "wooo" half note. A measure later it starts playing back, and continues through most of the piece. Then I start the melody. Once I finish the melody, it starts playing back, and I start playing some lower sustained notes. Throughout the piece, I bring back different parts and combine them different ways. The sequence of recording and playback is all set up in the music software I'm using.
The software and hardware
I've been accumulating the recording hardware and software for a while now, but I had to figure something out to get live looping actually working. First off, here's a list of the main things I used.
Ableton Live
https://www.ableton.com/en/live/
- Software for doing the live recording and immediate playback. The actual live looping.
- Also recorded the performance.
MuseScore
https://musescore.org
Before I got into really practicing the arrangement, I wrote it out in MuseScore, a free music notation application for Mac, Windows, and Linux.
Sticky Board for prototyping the arrangement
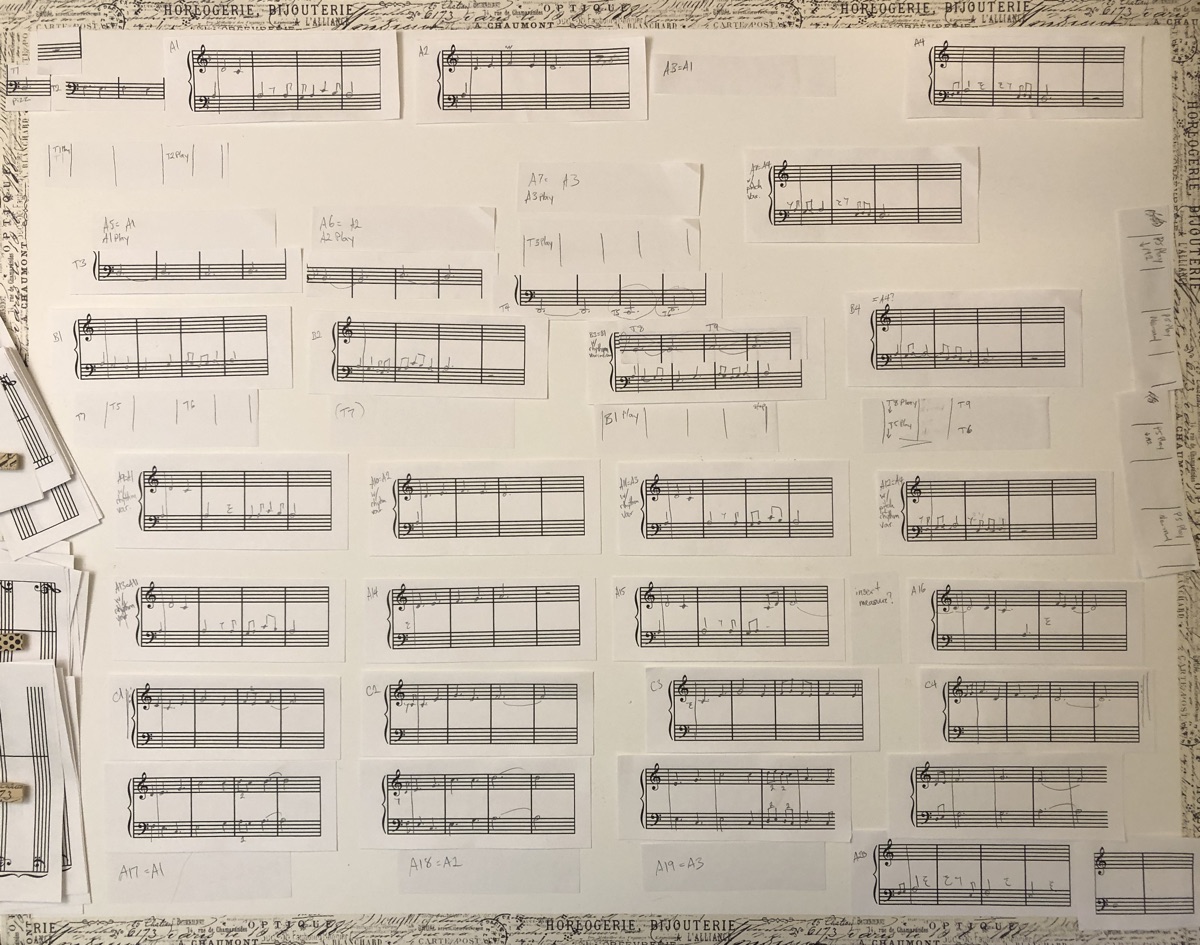
This is where the arrangement really started to take shape and change from an initial idea into a better formed piece of music. It's posterboard, 28 by 22 inches, with cut up strips of staff paper. I used repositionable glue on the back of the staff papers so I could move the musical ideas around the board like sticky notes. I’m honestly not sure how I would have started assembling the piece without this.
Midi Keyboard: Oxygen 49
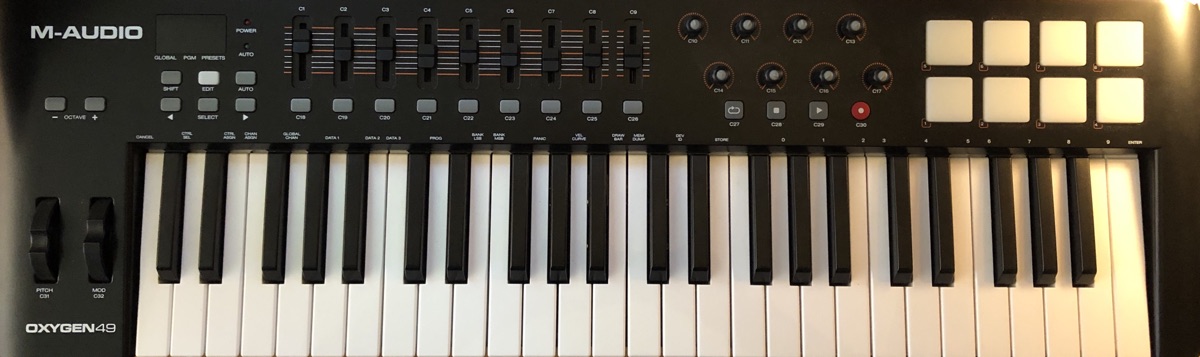
This aids in entering notes into MuseScore, and for configuring Ableton Live. Any midi keyboard with channel options and some continuous controllers will work just as well.
Audio Input: UX2
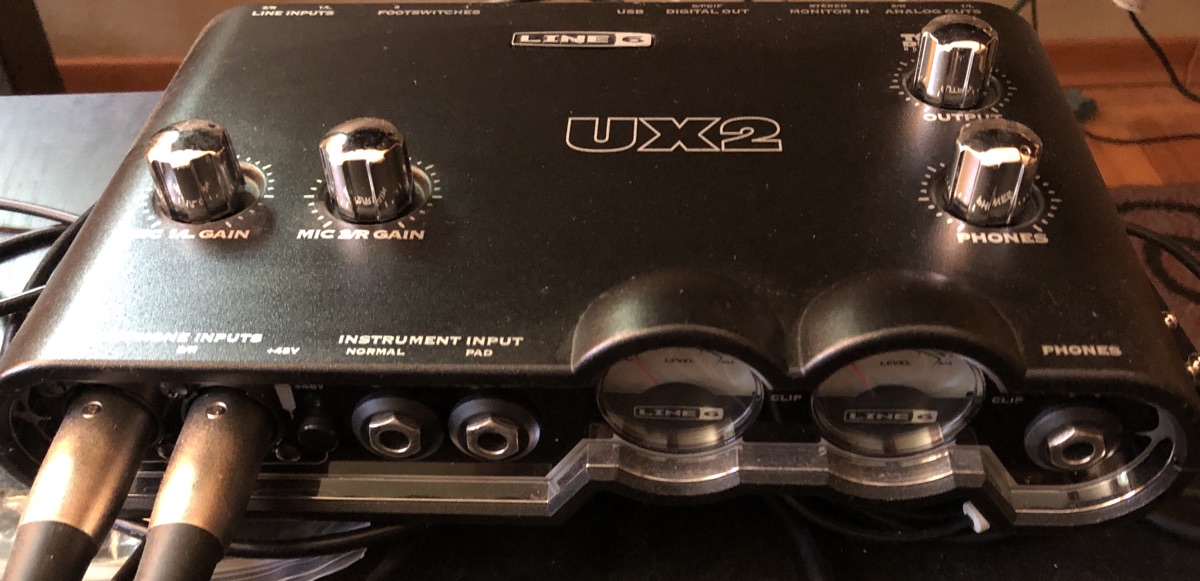
This takes the audio from the mic, digitizes it, and passes it on to the computer over a USB cable.
Mic: JK MIC-J 026
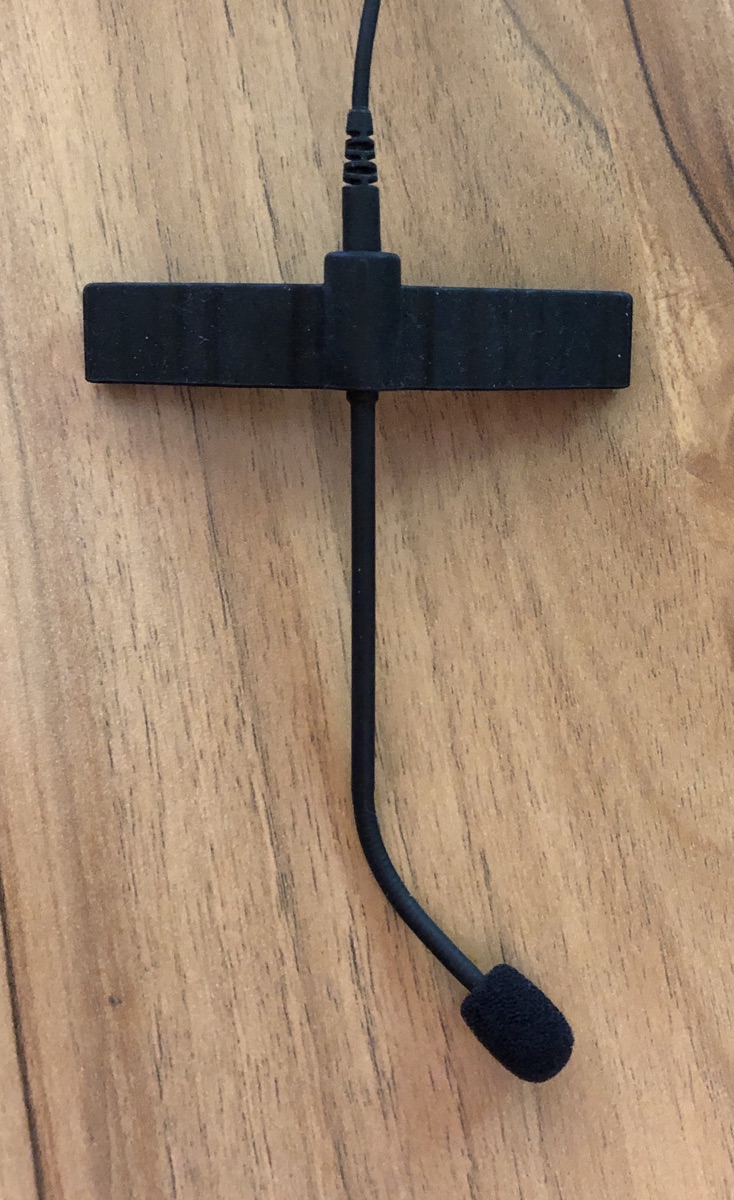
I used a very close, on-instrument mic. This particular one is pretty entry-level, inexpensive. It is mounted on the strings between the bridge and the bottom of the cello, and the mic extends from there toward the sound holes.
Earbuds: Apple
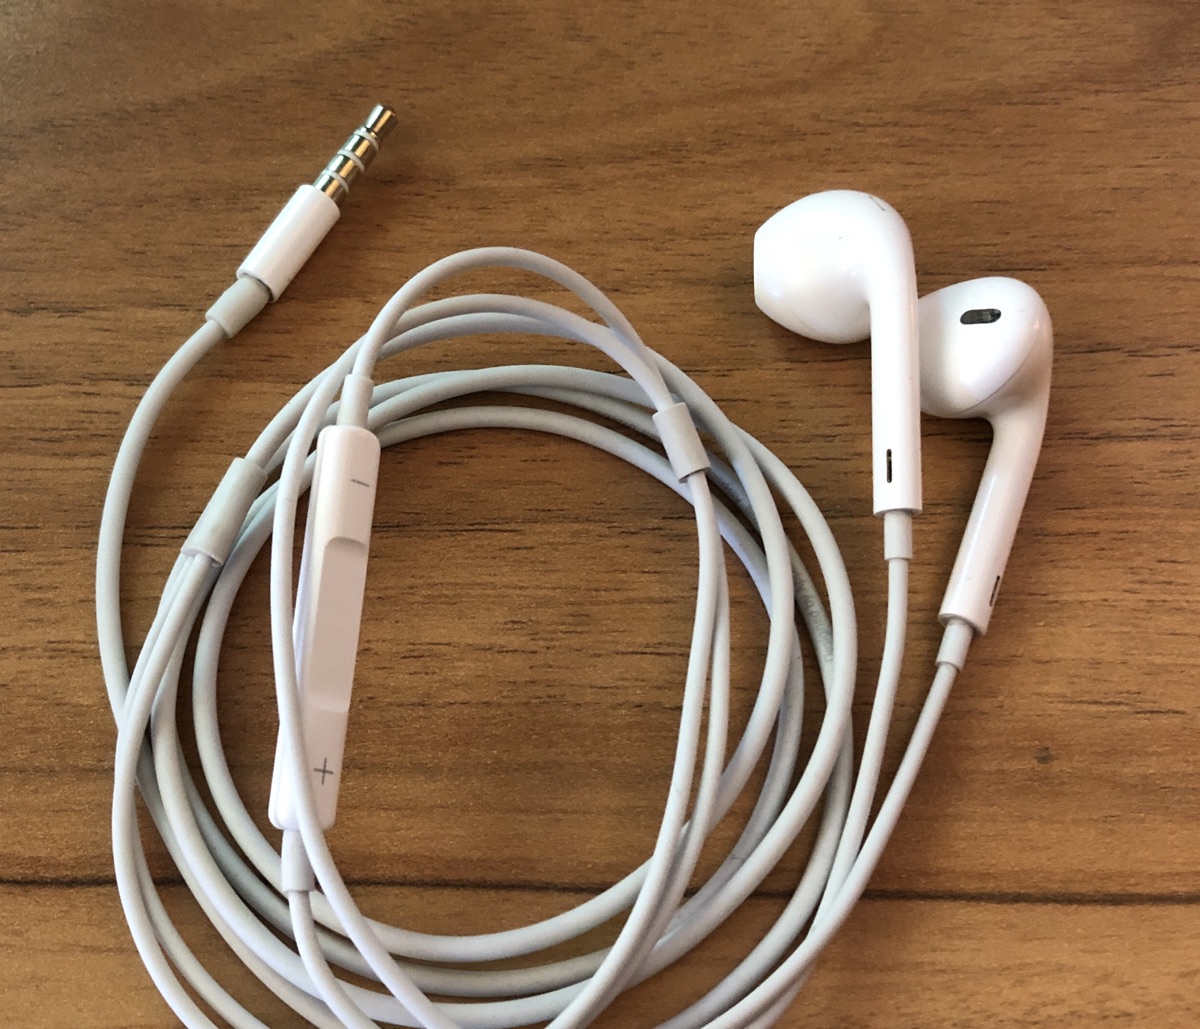
Basic Apple earbuds. I used these to monitor the looped audio and hear a click track to stay in sync and in tune.
Earphone extension cable
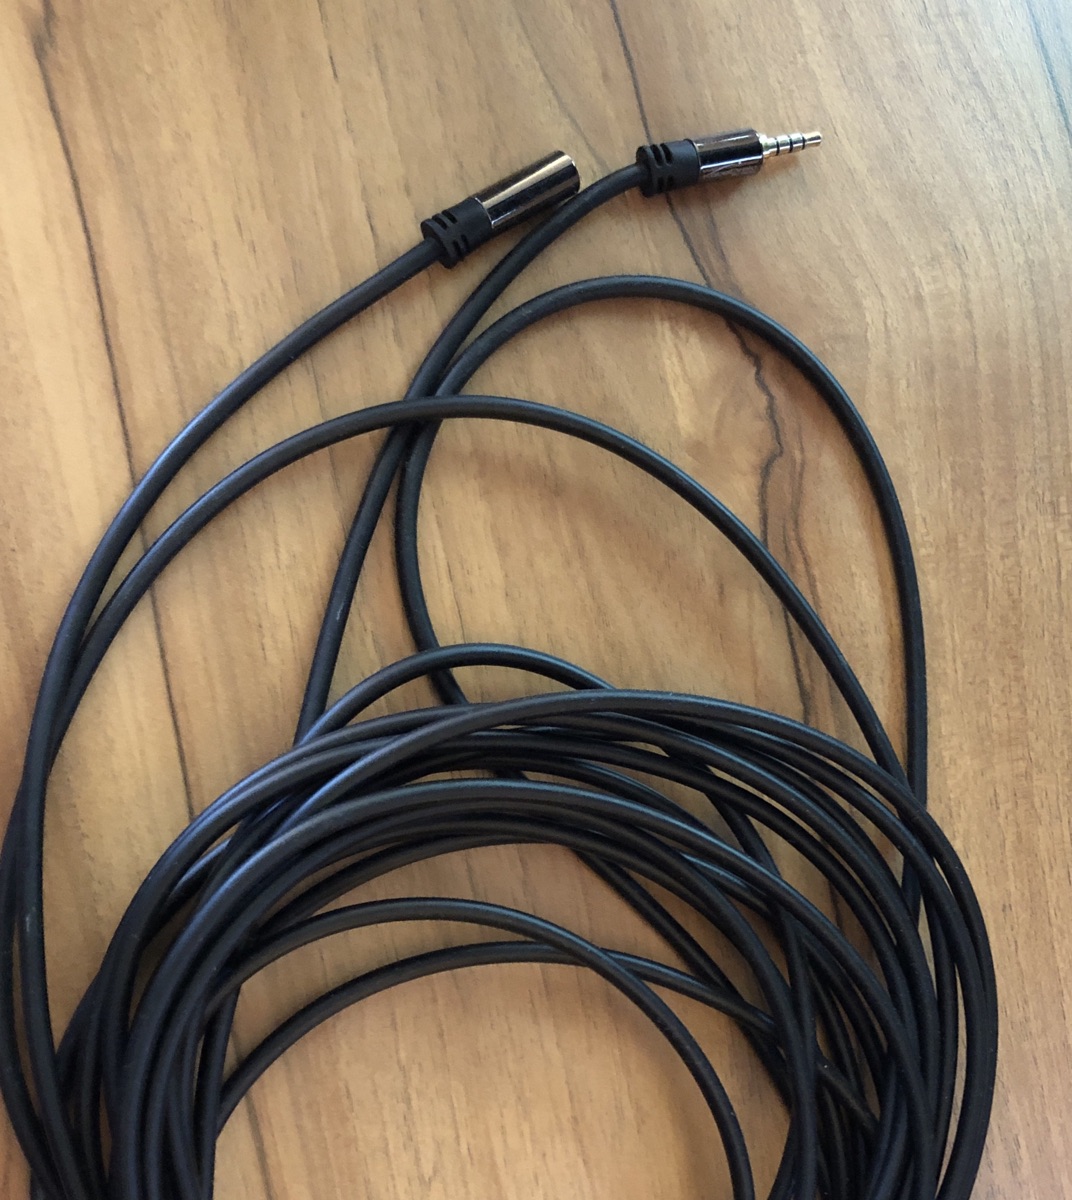
Because I’m playing a good distance away from the computer.
Cello
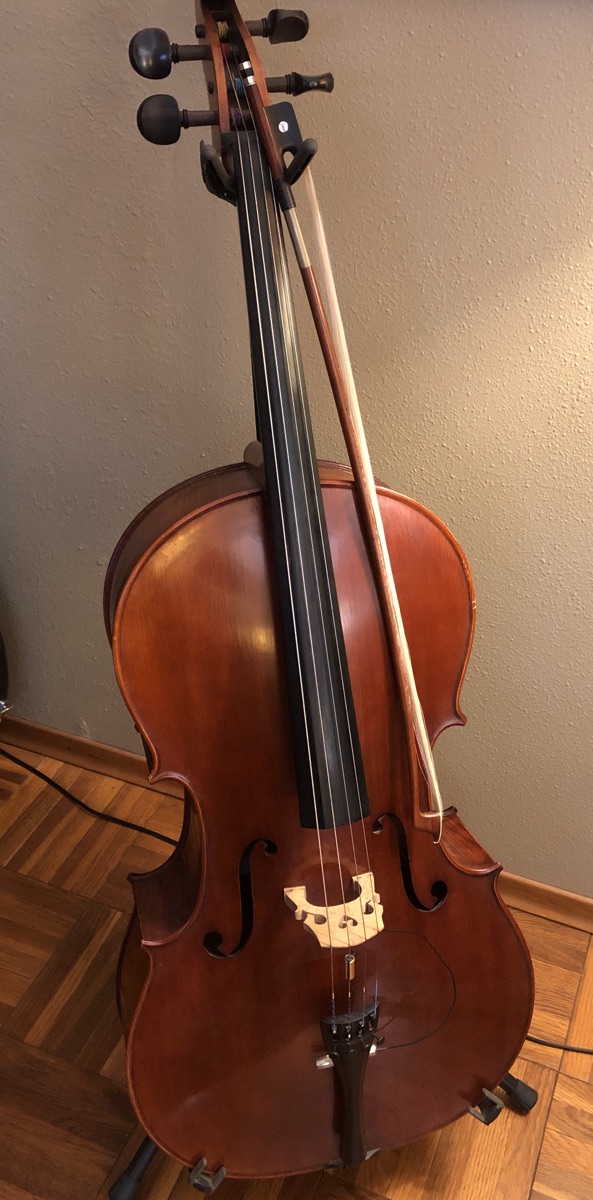
The acoustic musical instrument, making all the sounds. Yeah, I know this is obvious, but I wanted to include it for completeness.
iPad

Used mainly for forScore. I also experimented with sending a midi click to it, but didn’t end up doing that.
forScore
https://forscore.co/
This is an iPad app for reading the printed music while performing. A printout on paper would have worked fine too. But I like forScore because it's a way to store a complete music library in a small space, and allows me to easily leave notes to myself. It's a great app that you would enjoy using if you have an iPad and play music.
MacBook Pro
Because all this stuff needs a host machine.
Cello bench, floor strap, music stand
Basic equipment for playing cello.
What I’ve learned about the software and hardware
Besides collecting the materials, of course I had to learn how to use all of this to create a live looped cello performance. I suppose this is the "Audio Engineer" role. Here are some of my key lessons.
The biggest lesson was simply how to set up Ableton Live to do arranged live looping. The video Pedal-Free Live Looping with Ableton Live by scarthfilm demonstrates the method that I ended up using.
My basic setup in my Live set is with 7 audio tracks to record into. Pizz goes into one, an accompaniment line goes into another track, the main melody goes into another track, and so on. I preset points on each track to start recording, stop recording, start playing back, and stop playing back. I also used a dedicated track for recording.
I was experiencing very bad delays in Ableton Live. At first I didn't really notice, but as I added tracks, the timing delays were so bad it was going to be impossible to perform in sync. Here's the pro tip: turn off the Reduced Latency When Monitoring feature. (Kind of counter-intuitive!)
I also figured out how to separate out stuff I wanted to hear (a click track) from what I wanted to record (my live playing + looped tracks). I'll include details about this and much more about my Live set in a future post.
I discovered firsthand why using global quantization is essential for predictable timing. Placing midi event directly on the timeline, even when using snapping and setting numbers precisely, results in timings that are off, and get more and more off over time.
What I've learned as a cello performer
Steady rhythm is important. I found I tend to play slightly late. The techniques I chose to do in live looping required that I be precise in timing, especially on note beginnings.
What you do at the very beginning has a lasting impact for the whole piece.
Every performance is a bit different. Performing is ephemeral. You play it once, and it’s done. It’ll be different the next time.
What I’ve learned as an arranger
I had to figure out how to get from a song I only had a recording of, to something I could play on cello. This involved inventing a process, at least from my perspective, because I have to run across tutorials on how to arrange for live looping. There are plenty of tutorials on how to use the software, but not that I've found on how to write an arrangement. It's quite a puzzle! So here's the process I ended up using.
Dictation
The first main step was notating the original piece. I played another youtube video and wrote down the music in pencil on staff paper.
Layer and slice planning
This is probably the most mentally challenging and interesting and creative parts of the whole process. This is an arrangement, and you don’t get a live looped arrangement by playing the melody the whole way through. So this layer planning is where I start working out the texture and harmonies. It’s where I plan out the sequence of recording and playback, and how short or long each audio slice will be. The main tool I used at this stage is the Sticky Board, which was indispensable as a sort of whiteboard with modular music sections.
Editing and Transposing
In the first key I had this in, it went down to a low B flat, which a whole step lower than the cello goes. I experimented with using software to repitch a loop down a whole step, but I just couldn’t get it to sound right. Moving the whole piece up a whole step avoided that issue. Transposing loops and even more extended audio effects are definitely possible, and I hope to incorporate this type of thing into future pieces.
Writing the final cello part
Up until this point, I was playing off of the pasteboard, experimenting with different sequences. Once I started to settle on a sequence, it made more sense to write it all down into a single line part to play from. The Live set was set up; all I had to do was hit “play” and I didn’t have to think tech any more. For the actual performance, I only had to concern my self with playing, so having the actual things to play laid out before me made that much more practical, and a much more familiar way of playing.
Challenges on Daughter of the Sea
Pick-up notes
Most (all?) looped pieces that I know of do not use pick up notes. The melody and the accompaniment both start on the main beat of a a measure. (pick up note: dah DUM dum dah DUM dum. No pick up note: DUM dum dah DUM dum dah). The melody of Daughter of the Sea relies on a pick up note, and the accompaniment is strongly based on the main beat. This was a unique challenge, but was solved by offsetting the melody loop.
Changing harmonies
Partway through the piece, the harmony changes. It would be disruptive to record new harmonies at that point in the piece, so I worked out how to reuse individual notes from phrases earlier in the piece.
Potential updates to this piece
A couple thoughts on what I would do if I were to hone this arrangement and performance some more.
I might reconsider the main accompaniment: the pizz, the half note every other measure. The pizz began as something that would serve as the metronome, but I still ended up relying on a midi metronome for the whole length. The half notes began as a pair of dotted halfs, a way to add some texture early, so that I wouldn’t have to spend time adding later on in the piece. That started to feel too thick and heavy as the piece built up, so I reduced it to a measure of rest + a half note, quarter rest. It seems like it makes the beginning feel a little uncertain, the half note kind of comes out of nowhere. I think where I would take this piece might be to start more directly with the melody, and wait until after the full statement to start adding actual harmony. The risk that that brings is that the original statement may be more likely to be out of tune, which could cause problems as more layers get added. As it is currently, the steady pizz on a single pitch, combined with the half note on alternating measures, provide an anchor of both pitch and rhythm.
I would also probably practice more to fully memorize the piece, and perform it from memory instead of reading the written music.
Next steps for my next pieces
Effects per track
This could add more of an impression of distance and location, and could enable more varied instrument sounds.
EQ, reverb, effects
I’d like to find a combination of EQ, reverb, and other audio effects that enhance the cello into a more present and rich sound. I like what I did for this piece, but I’d like to improve it further. But it’s quite a rabbit trail, exploring all the many types of reverb and the options of each. And after adjusting reverb and EQ bit by bit, I start to lose perspective and nothing sounds quite right.
Automation of effects
Adding reverb, desaturating sound, making it sound dull, or thin, then bringing back the full sound. Changing these and other effects over time is what automation is, and there are a lot of interesting things that this opens up.
Simpler or more idiomatic pieces
I think I dove into the deep end with Daughter of the Sea. Pick up notes and harmony changes are a couple of the things that made this piece challenging to work out. And it took a long time. So for the next piece or two, I think I’ll choose or write pieces that work more naturally, better for live looping.
Control the routing/pan/effect of the live sound
Make each part sound distinct from the very beginning, instead of from the first looped playback.
Current: Live playing is always front & center, and each looped track is panned.
Idea; Live playing has the same pan and effect as when that particular part plays back.
Use more layers
I just think it would be really cool to build up a lot of texture, and fill out the harmony even more.
Build to a bigger high point
In this piece, I felt like the high point really wanted to be bigger, but I found it challenging to prepare enough layers to support that climax.
Share sheet music and live set
This would basically be the page of sheet music I ended up reading from and Live set I had running on my computer.
Add midi track to simulate performance while developing the Live set
When working out the Live set, I don’t want to keep picking up my cello, or even have to keep playing on a midi keyboard, testing out the sequence. Having a midi track that contains exactly what I will be playing, will allow testing the full set using a synth sound, without having to play live.
Enable easy playback of whole piece, multi-track, starting anywhere
My current setup records lots of slices to individual tracks. If you play it back, everything starts at the same time. I’d like to work out a way to have it play back from the beginning, as well as from any point in the piece, and still be listening to the multi-track version. This would make it possible to fine tune effects, balance, and automation.
Make it easy to toggle monitoring
Or set up monitor-only tracks that are not played to the public.
Get generally better acquainted with live looping methods in Live
And maybe even develop ways that make it easier. Work out a good setup for automation, supporting automating many things: pan, volume, various effects.
Create a template for live looping
Once I’ve worked out the issues that are bugging me.
Try ALK
I might test out ZenAudio ALK I do aim to create a very flexible and easy-to-use template for arranged live looping in Ableton Live, but it’s probably worthwhile to check out ALK too. It is music software with the primary purpose of designing and performing arranged live looped pieces. Maybe I’ll use it as inspiration for an Ableton Live set, or maybe I’ll actually start using ALK for performance.
Add transitions
In this arrangement, I went directly from section to section. Adding transitions between sections would make for a more interesting piece. But that’s more challenging to plan out in a live looped set.
Mics & pickups
Besides the on-instrument mic that I used in this recording, I also have room mics and a pickup, which picks up vibrations directly from the instrument body. Using all of these inputs in various mixes could add a lot more variety and interest.
Improvise on basic loops to play with more ideas more quickly
Just goof around some. Play some rounds, like Row Row Row Your Boat.
Multiple video panes, to display what is being heard.
The video that I made is just me, plus the audio that was recorded in realtime, during that very performance. But it can still be hard to realize how all of the sounds that are playing back were performed all in that single session. I’m thinking of keeping up one video pane for each track that’s playing back may help illustrate better what’s happening with the audio.
Multitrack instead of just live looped
A multitrack recording is a very different thing than live looping. The allure of live looping is that it’s all done live, in one shot. And you can only add or change one thing at a time. One layer at a time. Multitrack recording allows for a more traditional arrangement, and the development of multiple parts simultaneously is possible, and normal. You lose the live aspect because each part has to be recorded at a separate time. But you gain the ability to write a normal arrangement with harmony changes, key changes, transitions, and a varied melody.
Wrapping up
This has been quite a journey. I started cello with an ambition of doing live looping, and I gradually acquired the skills and gear to do it. I’ve learned a TON that enhance other areas of music. Skills: dictation (notating by listening), arranging (specifically for live looping), audio engineering (working out the Live set setup), cello performance (live looping really makes you fine tune things). And it’s clear that while this has been a major step, it’s also clear that there are many more major steps to come. I’m really looking forward to many more years of exploring and creating.
Please feel free to let me know what you’d like to see next from me, or share your own experiences with music and live looping by leaving a comment or using my contact form.